
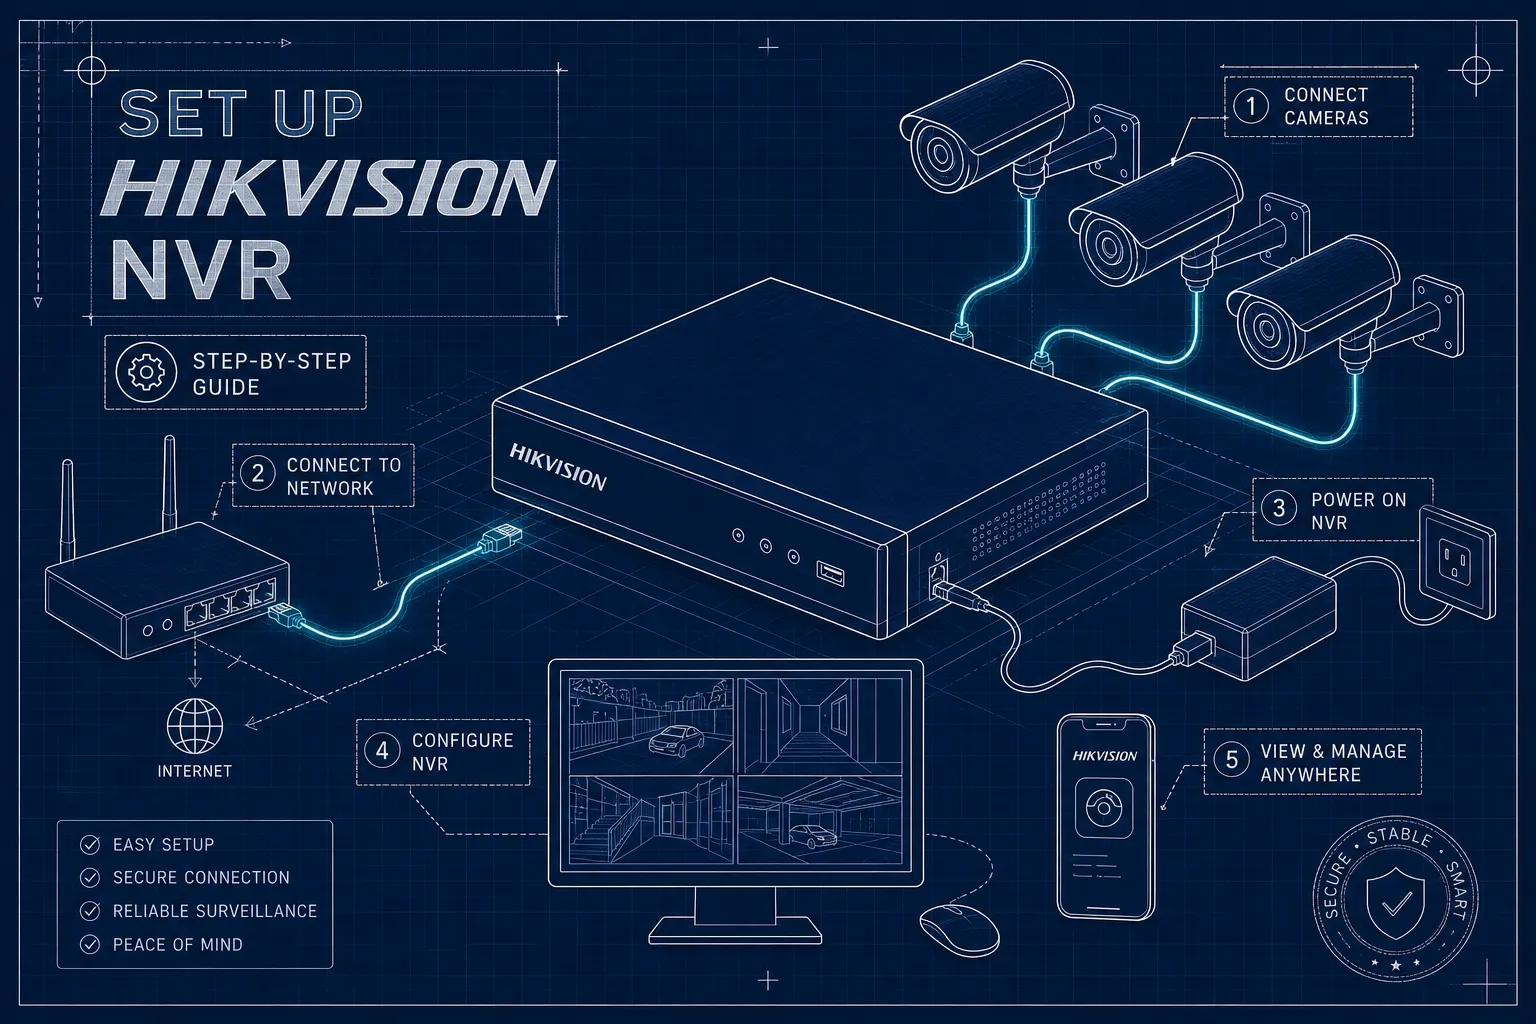
Imagine you are a business owner in Nairobi who has just taken delivery of a Hikvision NVR bundle. The box is sitting on your desk, cables coiled inside, and you are not entirely sure where to begin. That feeling is completely normal. This Hikvision NVR setup step-by-step guide walks you through the entire process in the right sequence, from unboxing to watching live footage on your phone. For most small, single-site installations, that journey often completes in under two hours.
Before you touch a screwdriver, note that Nashnaal Electronics (NE) offers a free site survey with selected NVR bundle purchases (confirm availability with the team). If you want a professional technician to assess your space, recommend camera positions, and walk you through the workflow before a single cable is run, book that survey first. It can save hours of rework, particularly in larger premises such as warehouses or multi-floor offices.
This Hikvision NVR setup guide covers the process in a recommended order that works across most models: hardware preparation, HDD installation, the first-boot wizard, camera pairing, recording schedules, Hik-Connect remote access, and security hardening. Menu names and step sequencing can vary by model and firmware version, so keep your Hikvision quick-start guide for your specific unit to hand as a reference. Follow the sequence below and you will not miss a step.
1. Hikvision NVR setup step-by-step: hardware checklist
The most common reason an installation stalls midway is a missing cable or incompatible component discovered only after everything is already open on the workbench. Getting your hardware list right before you begin saves significant frustration.
The hardware you need on hand
Gather the following before you start:
- The NVR unit
- A surveillance-grade HDD, Seagate SkyHawk and WD Purple are widely compatible with Hikvision recorders, though you should verify your specific NVR model against Hikvision's official compatibility list before purchasing
- A monitor with HDMI or VGA input
- A USB mouse
- Cat6 Ethernet cables for each camera
- A PoE switch, if your cameras will not connect directly to the NVR's built-in PoE ports
One of the most common and costly mistakes is installing a standard desktop HDD instead of a surveillance-grade drive. Desktop drives are not designed for the 24/7 write cycles a CCTV system demands, and they fail well ahead of their rated lifespan.
Deciding on camera placement before setup
Knowing your camera layout in advance determines whether you use the NVR's built-in PoE ports or an external PoE switch. Direct PoE ports are simpler and fully plug-and-play; an external switch gives you more flexibility in larger premises but requires manual camera configuration on the NVR. Resolving this decision before any cables are run means you choose the right NVR model, the right switch, and the correct cable routes from the start, rather than discovering problems after drilling through walls. If you purchased a bundle from Nashnaal Electronics, check whether a site survey is included with your order, as it covers exactly this kind of planning.
2. Installing the HDD and completing the first-boot wizard
The physical and software foundation of the entire system sits in this section. Work through it as a single power-off to power-on sequence and you will not need to revisit any of it. Powering down fully before opening the casing also protects the drive from static damage during installation.
Physical HDD installation
Power off the NVR completely before opening the casing. Remove the top cover, seat the HDD in the mounting bay, and fasten the screws firmly so the drive does not vibrate loose during operation. Connect the SATA data cable to the motherboard port and the power cable to the HDD, then reinstall the cover. When you power the NVR on for the first time, the drive appears as "Uninitialized" in the storage menu. That status is expected; you will format it through the NVR menu after completing the setup wizard.
Navigating the first-boot setup wizard
The wizard guides you through the following steps in sequence:
- Language selection
- Admin password creation (minimum 8 characters with a mix of uppercase, lowercase, numbers, and symbols)
- Camera activation password
- Unlock pattern
- Time zone and date/time settings
- Network configuration (DHCP or static IP)
- Hik-Connect service enablement
Pay close attention to the admin password step. The password set here cannot be recovered without the GUID file export or pre-configured security questions, and recovery options vary by model and firmware. Write it down and store it securely offline before moving to the next screen. Refer to Hikvision's official activation and password recovery guidance for your specific model if you need further detail.
NVR HDD formatting and recording preparation
After completing the wizard, go to Main Menu → System Configuration → HDD. Select the new drive from the list and press Init. The status changes from "Uninitialized" to "Normal" once formatting is complete. This step erases all existing data on the drive, so confirm you have selected the correct disk before proceeding. Once the status reads Normal, your NVR is ready to record.
3. NVR PoE camera connection and adding IP cameras
How you add cameras depends on how they are physically connected, and mixing up the two methods is the most common source of confusion during setup.
Connecting cameras directly via the NVR's PoE ports
For cameras plugged directly into the NVR's rear PoE ports, the process is plug-and-play. Open Camera Management, select the relevant channel, choose Plug-and-Play as the add method, and save. The camera should come online within a minute. The NVR assigns an IP address automatically and applies the activation password you set during the wizard, so no additional credential entry is needed.
Adding cameras through an external PoE switch
For cameras connected via a separate PoE switch or LAN segment, use Manual add mode. Navigate to Camera Management → IP Camera, select an unused channel, click Edit, choose Manual, and enter the camera's IP address, username, and admin password. Before attempting this, confirm both the camera and the NVR are on the same subnet. Tools such as SADP or HiTools help locate a camera's current IP address on the network quickly, which saves time when you are working across multiple channels.
Fixing cameras that show offline or no video
Most offline issues trace back to four causes: a loose or faulty Ethernet cable, the wrong add method selected (Plug-and-Play versus Manual), a subnet mismatch, or a credential mismatch where the channel password does not match the camera's activation password. Work through these in order, try a different cable or a different PoE port, confirm the add method matches how the camera is physically connected, verify both IP addresses are in the same subnet range, and confirm the username and password are correct. Most cameras come back online within these four checks.
4. Setting up recording schedules and storage
Live view without recording is just an expensive monitor setup. This section gets the NVR capturing the right footage at the right times so you actually have something to review when an incident occurs.
Choosing between continuous and motion-triggered recording
Continuous recording captures everything but fills the HDD faster. Motion-triggered recording extends storage duration significantly but can miss events if the detection sensitivity is set too low. For most Kenyan SME applications, retail shops, pharmacies, distribution centres, a hybrid schedule is often the practical choice: continuous recording during business hours and motion-triggered recording overnight. This balances full coverage during peak activity with efficient storage use when premises are quiet. For a rough sense of how different combinations affect retention, Hikvision's storage calculator (available on their official site) lets you model camera count, bitrate, and HDD capacity together.
Configuring the recording schedule on the NVR
Go to Main Menu → Storage → Schedule. The NVR displays a weekly time grid for each camera channel, colour-coded by recording type. On most firmware versions, blue indicates continuous recording and yellow indicates motion detection, though exact colours and labels can vary by model and firmware, so cross-reference with your unit's interface guide. For a retail shop, set continuous blocks from 7 am to 8 pm and motion blocks from 8 pm to 7 am. Save the schedule, then confirm recording is active by opening the playback timeline and checking that footage exists for the past few minutes. If the timeline is empty, revisit the schedule and confirm the HDD status still reads Normal.
5. Hikvision NVR setup step-by-step: enable Hik-Connect remote access
Remote access is the feature most users want to configure first, but it works most reliably when the system is fully configured locally beforehand. Complete the previous sections before starting this one.
Activating Hik-Connect P2P on the NVR
Go to Main Menu → Network → Advanced Settings → Platform Access. Enable Hik-Connect, accept the terms and privacy policy, and wait for the status to change to "Online." This activates the P2P cloud relay service, which means remote access works without any manual port forwarding on your router. Note the NVR's serial number displayed on this screen; you will need it when registering the device in the mobile app.
Adding the NVR to the Hik-Connect mobile app
Download Hik-Connect from the App Store or Google Play and create an account. Tap the plus icon, select Scan QR code, and point your phone camera at the QR code displayed in the NVR's Platform Access menu or on the device label. Enter the verification code when prompted, then tap Add to finish. Once connected, live view, playback, and push notification alerts are accessible from anywhere with a data connection, with no additional router configuration required.
Port forwarding as an alternative for browser-based access
For users who need web browser access through iVMS-4200 or the Hikvision web client, assign the NVR a static LAN IP address and forward HTTP port 80 and server port 8000 from the router to that address, these are common Hikvision defaults, but verify against your model's documentation. Use your public IP address to log in remotely. Note that many Kenyan ISPs use CGNAT, which can prevent successful port forwarding; confirm with your provider before relying on this method. Hik-Connect P2P avoids this issue entirely and is often the simpler option for residential and many SME deployments, particularly where public IP access or port forwarding is not feasible. Port forwarding is mainly relevant for VMS integrations or environments where Hik-Connect connectivity is restricted by network policy.
6. Security hardening before you go live
This section takes less than fifteen minutes but is skipped more often than any other step. An NVR that goes live without these checks is exposed to remote exploitation.
Password and authentication settings to confirm
Verify the admin password is strong and unique, not reused from any other device or account. Confirm all cameras share a strong activation password rather than any factory default. In Main Menu → System → User, remove any unnecessary accounts that were not created intentionally. Export the GUID file for password recovery and store it on a USB drive kept offline; without it, a forgotten admin password requires a full factory reset and loss of all configuration.
Enabling HTTPS and updating firmware
Navigate to Main Menu → Network → Advanced Settings → HTTPS and enable HTTPS for encrypted web access. Then check the current firmware version under System Information and compare it with the latest release on Hikvision's official download centre. Updating firmware on a new installation patches known security vulnerabilities before the system begins recording live footage. On a typical new installation, both steps can often be completed in under ten minutes and materially reduce the attack surface, refer to Hikvision's security hardening guidance for your specific model to confirm the recommended steps.
Your Hikvision NVR setup is complete
This Hikvision NVR setup step-by-step guide has taken you through every stage in a recommended sequence: gathering hardware, installing and initialising the HDD, completing the first-boot wizard, pairing cameras, configuring the recording schedule, enabling Hik-Connect, and hardening the system before going live. Working in this order avoids the most common rework because each step builds directly on the one before it. Whether you are completing a Hikvision NVR installation in Nairobi or setting up a multi-camera system elsewhere in Kenya, the logic of the sequence is the same.
If any part of the process feels uncertain, contact Nashnaal Electronics (NE) via WhatsApp to ask about compatible Hikvision cameras, HDD options, or the right NVR model for your premises, and to find out whether a site survey is available with your bundle. The team supports both single-channel home systems and large commercial installations across Kenya, and can help you get it right from day one.